Wednesday, September 25, 2013

WW: Spicy Long Beans with Sausage and Mushrooms

Wok Wednesdays wokking through Stir-Frying to the Sky's Edge


This was quite tasty, even with the few changes I made; and I'm sure this would be even tastier if made as the recipe was written. You just can't lose with Grace's recipes. 

Grace mentions in the book that there are two varieties of long beans - dark green and pale green. She prefers the dark green for stir-frying for they have a crunchier texture. I was only able to find the light green at the farmer's market. They worked just fine - however, I wonder if the dark green beans squeak against the teeth when you chew them, like the light green beans do.

I purchased fresh shiitake mushrooms in error. How does one do that? By skimming the recipe, rather than thoroughly reading it. This has gotten me into trouble more than once. The recipe calls for dried mushrooms, which you soak in cold water for about 30 minutes or until they are softened (which they never seem to do for me - maybe it was a good thing that I purchased fresh), and reserve some of the soaking liquid to be added later - I subbed plain water. 

The other change I made was I used Spanish chorizo in place of Chinese sausage. I thought for sure it was sausage I had in the freezer. That is what I get for not checking before going to the store - like not reading the recipe thoroughly.. and I omitted the 1/2 teaspoon salt, for the preserved vegetable was extremely salty, even after rinsing.

I'm not sure what gives this dish the "spicy" in the title. My stir-fry was not spicy at all and I did not even realize it was supposed to be, until I sat down to write this post. Maybe it comes from the Chinese sausage that I did not use, or the preserved vegetable - there are different varieties to choose from.

We enjoyed this dish even with the changes that were made. My husband said it was good the next day for lunch, and a co-worker said it was great - and he is Chinese.
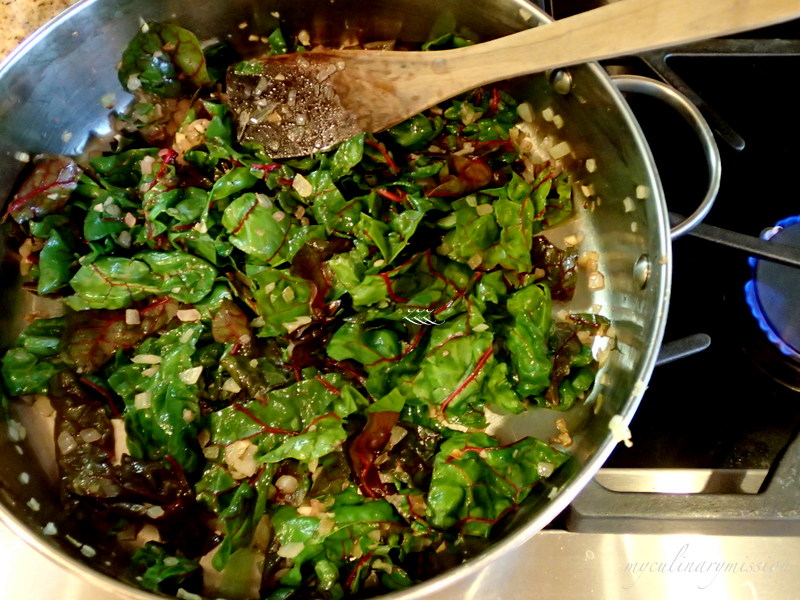


 Mise en place.

Bowl 1:  Pork, sausage
Bowl 2:  Mushrooms
Bowl 3:  Chinese long beans
Bowl 4:  Water 
Bowl 5:  Preserved vegetable, scallions, cilantro
Bowl 6:  Soy sauce, sherry, sesame oil
Bowl 7:  Sugar, pepper


One rule of the Wok Wednesdays group is we are asked not to post the recipes here on our blog. If you would like the recipe, you will find it on page 212 of Stir-Frying to the Sky's Edge, which you can purchase at your local bookstore or find it at your local library. You can also get the recipe here. However, I highly recommend purchasing the book - you won't be disappointed. 
 
Wok Wednesdays is an online cooking group. If you would like information about joining us, click here, or visit us on Facebook. Would love for you to wok along with us!


Saturday, September 21, 2013

Quinoa-Black Olive Cakes with Baby Greens and Roasted Red Pepper Sauce

Recipe from Fine Cooking Magazine


Looking for something healthy and delicious? Look no further.

Did you know that quinoa is considered a superfood? And it is a seed, not a grain? It packs a healthy punch - it is a complete protein (a source of protein that contains an adequate proportion of all nine of the essential amino acids necessary for the dietary needs of humans or other animals - (source: wikipedia.com), and has a good dose of B vitamins, iron, calcium, potassium, magnesium, and vitamin E (source: Fine Cooking), and it tastes good!

This was fairly easy to throw together, though it does use a bit of equipment - pot to cook the quinoa, cookie sheet to cool it, bowl to mash the beans and mix the rest of the ingredients, blender to make the sauce, skillet to cook the patties, and a bowl to toss the greens, and of course your dinnerware. But don't let that stop you from making this tasty, healthy meal.

They are even good the next day. Hubby took the leftovers to work and even the boys liked them; and he served them with greens sans any dressing - men.

These would make a great party appetizer if made smaller, and would look lovely served on a rectangular platter with the mini cakes placed in a non-symmetrical pattern over the greens, drizzled with the sauce. Make sure to serve extra sauce on the side, whether you serve this as a meal or an appetizer.

I hope you try this recipe yourself. And if you do, let me know how it turned out and what you thought of it.

Enjoy!


Tuesday, September 17, 2013

TWD: [Not] Espresso Profiteroles

Tuesdays with Dorie baking through Baking with Julia
by Dorie Greenspan
Contributing Baker: Norman Love


I love profiteroles - who doesn't? I know, someone in the universe may not - and they be crazy.

I have only made plain profiteroles in the past. Norman's recipe is an espresso flavored profiterole, filled with a cinnamon ice cream and drizzled with a Grand Marnier chocolate sauce. Personally, the orange flavored chocolate sauce with cinnamon ice cream did not sound good to me, so I opted to use Emily Luchetti's cocoa sauce instead.

Upon reading the ingredients for the cinnamon ice cream, and my experience with the recipes in this book (bland, bland, bland), one teaspoon of ground cinnamon was not going to give this ice cream any kick. Again, I opted to use a different recipe. The cinnamon ice cream recipe from The Perfect Scoop by David Lebovitz, is intense! He uses ten cinnamon sticks to infuse the cream - so friggin good. I added a molasses swirl to the ice cream as well, after my sister-in-law mentioned to me that this flavor combination was to die for (this she had at Citizen Cake in SF - now closed).

I did follow the recipe for the profiteroles! And they were a dud. It was the worst choux pastry I have worked with. Not only did it not look right from the beginning, but it was an extremely sticky dough (choux pastry is normally soft and silky) and I had a hell of a time forming the profiteroles. They also did not rise very much after baking, and were rather dense and rubbery, instead of light and airy. With the addition of brewed coffee and espresso powder, I was surprised they did not have a very strong coffee flavor. Sad to say, they ended up in the garbage.

I went back to my trusted pastry chef, Emily Luchetti, for her profiterole recipe - as expected they turned out perfect! Thank you Emily!


This ice cream would taste fantastic served alongside a slice of apple tarte tatin or apple pie. I'm seeing a new Thanksgiving tradition on the horizon..


Seriously, which one would you prefer?


You can see how all the other talented bakers in the group worked this recipe by going to the LYL: Espresso Profiteroles link on the TWD site.

You will find the profiterole recipe on page 411 of Baking with Julia; David's cinnamon ice cream, page 38 of The Perfect Scoop - or just do a Google search; and for Emily's cocoa sauce, you can find it here.


Wednesday, September 11, 2013

WW: Stir-Fried Chicken with Pineapple and Peppers

WokWednesdays wokking through Stir-Frying to the Sky's Edge
by Grace young


Delish!

When recipes call for green bell pepper, I always sub them out for red - I do not care for the taste of the green bell. Here we finally have a recipe calling for red and what do I do? Sub it out for yellow and.. not sure what type of pepper it is - reddish in color, maybe a yellow/red mix, that has the flavor of a green bell.  I wanted to use the lovely looking peppers that were given to my by a friend.

I was surprised at the amount of sugar in this recipe - four teaspoons! The recipes I have made so far in this book calling for sugar, is only one teaspoon or less. Surprisingly the dish was not overly sweet.

After marinating the chicken, you are to drain and reserve the marinade and add it back in at the end. This I forgot to do. Maybe that is why I did not get any sauce pooling on the plate as mentioned in the book; that after a few moments the sauce magically appears. (The first time I made this, there really wasn't any liquid to drain.)

This is the second time I made this dish and it was just as delicious as the first. Using red bell pepper (which I did use the first go-around), does make for a more colorful presentation, as you can see here, on Karen's Kitchen Stories - a favorite blog of mine.


A friend gave me these beautiful looking peppers (along with some delicious green beans and pears! Thank you Kelley!!) from her huge CSA box. Perfect timing - all I had to buy was the pineapple and chicken - I had everything else.

Normally chicken is marinated in a mixture using egg white. In this particular recipe, an egg yolk is called for. The reason being, Amy Yip, who taught Grace this recipe, was trying to help her son gain weight. Did you know there is only 16 calories, and 0g fat in an egg white, and an egg yolk has 54 calories, and 5g fat? (source)

 Mise en place. 

Bowl 1: Chicken, cornstarch, egg yolk, sugar, soy sauce, dark soy sauce, and salt.

Bowl 2: Pineapple, bell pepper, and scallions.

Bowl 3: Sugar and salt.


The chicken is left undisturbed until it is nicely seared. 

Can I blame pour lighting for the blurry picture? The chicken seared nicely, even though I forgot to drain the marinade.

It is getting dark earlier these days - hence the low light photos.

You will want to use red bell peppers as called for in the recipe to make this dish really stand out visually. I wish I had taken a photo when I made this previously using the red bells. But never would I have thought I would sub out the red for something else.


One rule of the Wok Wednesdays group is we are asked not to post the recipes here on our blog. If you would like the recipe, you will find it on page 110 of Stir-Frying to the Sky's Edge, which you can purchase at your local bookstore or find it at your local library. I highly recommend purchasing the book - you won't be disappointed. 
 
Wok Wednesdays is an online cooking group. If you would like information about joining us, click here, or visit us on Facebook. Would love for you to wok along with us!


Wednesday, September 4, 2013

Book 107: Gardeners' Community Cookbook

The Gardeners' Community Cookbook is a compilation of recipes from gardeners from all 50 states, and is written by Victoria Wise, an alumna of the famed Chez Panisse restaurant in Berkeley, CA.


(Recipe submitted by Cecilia Rosacker-McCord of Lemitar, NM)

Apparently enchiladas in New Mexico are very different than your typical enchiladas that you get in a Mexican restaurant. Layering the tortillas, rather ran rolling them is a lot easier and less time consuming (genius in my book!), and is topped with a fried egg. Yum!


I expected the New Mexico chilies to be hot; in fact they have a deep, smoky, almost sweet taste with a soft warmth to them.

For the sauce you start by puréeing the chilies, onion, garlic and tomato with a cup of hot water to make a liquid paste. 

Liquid paste? That is an oxymoron if I ever heard one. Mine was all liquid. Maybe I should have used less than the one cup of water called for; actually the recipe calls for one to two cups water, and you start with just the one cup.

After sautéing your garlic and onion, add the chard and cook only until wilted.

Add the sauce and cook until thickened - about 8-10 minutes - NOT!

Being my "liquid paste" of a sauce, was more liquid than paste, it took about 35 minutes to thicken. I did not mind much - the aroma while simmering was amazing.

The recipe did not state what size [blue] corn tortillas to use. I went with the eight-inch. Only after reading the assembly instructions did I realize I should have went with the smaller six-inch - for you are supposed to place four tortillas side by side on a jelly-roll pan without overlapping. I could only fit two. You layer the tortillas, sauce, and cheese until you have a stack three layers high.

Bake your enchiladas in a 350°F for about 5 minutes, just until the cheese melts. Then top with a fried egg. Yes, an egg. Don't skip it - it really makes the dish; and that is what makes it authentically New Mexican!


So good!

We had these for dinner. Though they would be equally as delicious for breakfast; I see no reason why you can"t make the sauce the day before and reheat it before assembly.


Tuesday, September 3, 2013

TWD: Blueberry Muffins

Tuesdays with Dorie baking through Baking with Julia
by Dorie Greenspan
Contributing Baker: Rick Katz


This was a quick and easy recipe! I was able to bake these up and get in a couple of photos before my Saturday morning bike ride.

These muffins have a soft, light, airy texture, and a crisp flat top the day they are baked. These, like most baked goods are best they day of baking. I had one the next morning that was wrapped in plastic wrap and left on the counter overnight - the top no long crispy - my favorite part.
 
According to the recipe, you fill your cups 2/3 full. Being these are flat topped and not domed, I filled mine to the rim, hopping for a little more top - again, my favorite part. Doing this gave me a total of twelve muffins instead of eighteen the recipe states it will yield.

Cake flour is called for in these muffins to which I was short a quarter-cup-plus. I subbed in all-purpose flour with no problem. I also used non-fat milk (type was not specified in the recipe, but I'm sure it was full fat milk), and non-fat FAGE Greek yogurt in place of the sour cream.  As suggested by another baker, I reduced the salt to one-half teaspoon, and I topped my muffins with some sliced almonds and demerara sugar.

The recipe instructs you to toss the blueberries in a few tablespoons of the mixed dry ingredients to help keep them suspended throughout the batter. This did not work for me. My blueberries still sank to the bottom.

You bake the muffins at 400°F for eighteen to twenty minutes - my muffins were browning rather quickly, so I dropped the temperature down to 375°F for the last ten minutes or so.

As far as blueberries muffins go, aside from the sunken berries - these were good. I could see myself making these again, if I did not have so many other recipes waiting for me.


Maybe I can pass these off as "Blue Bottom Cupcakes".


If you would like to see the outcome of these muffins from all the other talented bakers in our group, head over to the LYL: Blueberry Muffins link on the TWD website.