Monday, May 27, 2013

TWD: Savory Brioche Pockets

Tuesdays with Dorie baking through Baking with Julia
by Dorie Greenspan 
Contributing Baker: Nancy Silverton 


I was excited to make these, for all the components sounded delicious. Goat cheese is my all-time favorite, and I love caramelized onions; and who doesn't like mashed potatoes!

This was my first experience with making brioche. It really is a wonderful dough to work with. You do however need a heavy-duty mixer to make this type of dough. I have read that this dough has pushed the limits of some mixers - may even have sent one to mixer heaven.

This same dough recipe was used for making the sticky buns made by the group last year at this time; the one recipe I passed on. I still have half the brioche dough in the freezer - maybe I'll attempt them after all.

Unfortunately these were just OK. Not anything like I had inticipated. The flavor quotient needs to be anted up a bit. I'm thinking roasted or grilled asparagus would have been more flavorful and the potatoes were rather bland as well. I wish I had gone with my initial idea of replacing the chives with a mixture of sage and thyme. The spuds also were very dry, to which I added a half cup of non-fat yogurt. I was surprised the recipe does not call for adding salt and pepper to the onion mixture; I did, and it made a big difference in taste - however, it did not help the overall product in the end.

I loved the look of these - they do make for a beautiful presentation. With some flavor enhancement and made smaller, they would make a great appetizer for a party.

Success meter (1-3): 1.5

The sponge. This consists of whole milk (I used half and half - I forgot to buy milk), yeast, egg, and flour. Mix together and sprinkle more flour on top and let rest for 30 to 40 minutes, at which time the flour cracks - the indication that your yeast is alive and well and ready to proceed.

Add to the sponge - sugar, salt, eggs, and flour. This gets mixed for fifteen minutes till the dough comes together and you hear a distinctive slapping sound (I barely heard it) from the dough hitting the side of the bowl. You now have a beautiful soft ball of dough.

Next step is to add the butter which needs to be similar in consistency of the dough. Smear your butter on a cool surface with a pastry cutter or bash it with a rolling pin. Do not handle the butter with your hands or mix it too much. You want it to remain cool - not warm or greasy.  This you add to the dough and mix. Your beautiful ball of dough breaks apart at this time. Do not fret! The dough miraculously comes back together into another soft and supple ball.

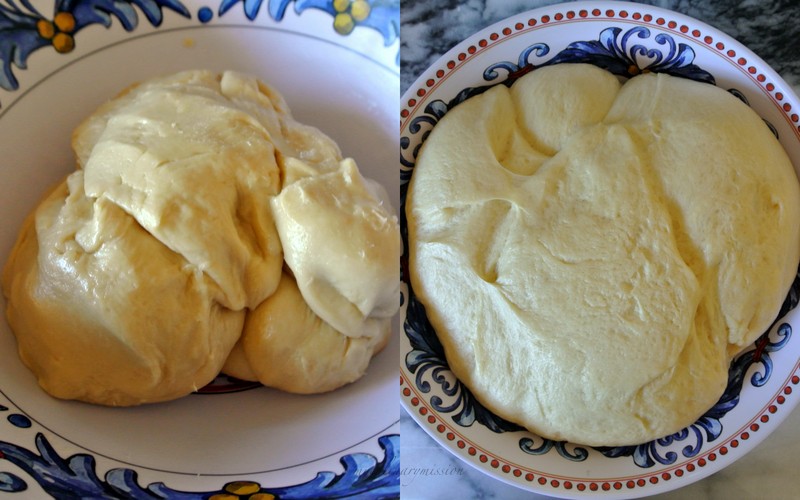
Place the dough in an oiled bowl to rise for two to two and a half hours, until doubled in bulk.

After the first rise, deflate the dough by running your hand underneath the perimeter and giving it a little fluff with your hand. Cover and chill overnight.

Prepare your filling by sautéing your onions, boiling your potatoes, and asparagus. I highly recommend roasting or grilling the asparagus for more flavor.

On the advice of another baker, I cut my circles in two different sizes to save time of having to stretch the second circle larger after cutting to accommodate the mound of filling.


 If only they tasted as good as they looked.

As you can see, only the tips of the asparagus are used here. To use up those tipless spears, grill them and use them in Grilled Asparagus and Portabella Mushroom Salad. (Portabella/Portobello. Tomato/Tomahto. Depending who you talk to or read, it's one or the other. Me, I prefer the spelling with o's.) A photo of this salad appears below.

 Oh so very pretty; too bad they don't hold their shape after baking. 
Once all your pockets are formed, give them an egg wash and let rise for twenty minutes.

 The sage leaves I purchased were enormous in size! I folded them in half and gave them a little trim.

After the twenty minute rise, they should be slightly puffy and spongy. Give them a second coating of egg wash and top with poppy seeds and sage leaves.

 Bake until beautifully golden brown.


 Here we have a beautiful (though bland) brioche pocket served alongside the delicious salad mentioned above.

Carrie at Loaves and Stitches is our host for the week, you can find the recipe on her blog. And don't forget to check out the results and other variations of this recipe from all the talented bakers we have in the group. You can find their links on the Tuesdays with Dorie website under the link titled LYL: Savory Brioche Pockets

I would like to share a couple of tips with you.:

To keep the dough cool while rolling out and not having to move the dough back and forth from the fridge from it becoming too soft and warm while handling, I placed an ice pack under my marble board. Works like a charm.

I also placed an ice pack between two cookie sheets while forming the pockets. This may have hampered the second rise a bit; I did not feel they rose all that much more, however, it seems no harm was done.

A fabulous tip I learned from my friend Christine, use the butter wrapper to grease your cookie sheets (or bowl in this case). Usually there is just enough butter left on the wrapper if you have let the butter set out to come to room temperature.

Wednesday, May 15, 2013

WW: Wok-Seared Vegetables

Wok Wednesdays wokking through Stir-Frying to the Sky's Edge
by Grace Young


I wish there was something more to say about this dish, but there isn't other than it was quick, easy, and delicious, as most of Grace's recipes are.

Success meter (1-3): 3


I really wanted to use the cool tool - the kinpira peeler, for julienning the carrots, but I felt they needed be the same consistency as the asparagus (personal preference) so I julienned them the old-fashioned way - with a knife.


One of the rules of the Wok Wednesdays group is we are asked not to post the recipes here on our blog. If you would like the recipe, you will find it on page 223 in Stir-Frying to the Sky's Edge, which you can purchase at your local bookstore or find at your local library. I highly recommend purchasing the book - you won't be disappointed. 

Wok Wednesdays is an online cooking group. If you would like to join us or just want more information, click here or visit us on Facebook.

Friday, May 10, 2013

Linguine with Roasted Asparagus and Almond Pesto

Recipe courtesy of Fine Cooking Magazine


It was not my intention to blog on this recipe. However, upon assembling the ingredients, the colors shouted to me to at least take their picture if nothing else - and I'm so glad I did.

This is such an easy (and healthy!) dinner to throw together on a weeknight. All I can say is to use your favorite pasta. I ended up using a store-brand pasta (.99/lb) as opposed to the visually appealing organic pasta listed for $3/lb.. The store brand, which I have to mention because they have such a following, is Whole Foods. I love this store - just not their pasta - it has a gummy texture. I prefer the Barilla Plus pasta, which Whole Foods carries, albeit a small selection (shapes).

Other than the pasta issue, this was very tasty and a bit different. A nice change. The sauce is an [asparagus] pesto, made with almonds - not pine nuts; which is a good thing for I am not a fan of pine nuts, not only for their taste, but their outrageous price tag; and don't skip garnishing the pasta with the extra almonds - they add a nice nutty, crunchy, and textural contrast to the delicate pasta and tomatoes.

This dish is visually appealing as it is delicious - you may want to add this to your list of recipes to make for company.

Success meter (1-3): 3


Tuesday, May 7, 2013

TWD: Rhubarb Upside-Down Cake

Tuesdays With Dorie baking through Baking with Julia
by Dorie Greenspan
Contributing Baker: Johanne Killeen


This turned out better than expected!

From the beginning I had my doubts on this one. I started this cake at a time when I was feeling tired and not in the mood to bake, but had to make it being I purchased the rhubarb almost a whole week ago. I never made it to Sur La Table (my all-time favorite culinary store) to purchase the paper molds to make this into baby cakes as the recipe called for - the original name of this recipe is Rhubarb Upside-Down Baby Cakes.

The book states you can use a 12-inch pan in place of the eight 4-inch pans called for. Unless you want a "torte" instead of a cake, a twelve inch pan works great. I think a 10-inch pan would have been a better choice.  My cake was not much higher than the height of a dime.

I had subbed the pecans called for in the recipe with walnuts. I'm trying to use what I have in the pantry, especially those bags that are already opened. I also used Cognac in place of the bourbon - again, that is what I had on hand. This is one of those cakes you can easily sub what suits your needs; in fact it begs to be played with - think pears or mango, even cranberries during the holidays.

This simple butter cake came out moist and tender with a slightly spongy feel and with a crisp exterior. I don't think I would have achieved a crisp edge using a smaller pan. The walnuts (which I'm not a big fan of) ended up being a nice addition, I used about a 1/2 cup rather than the two tablespoons - really? Only two tablespoons? - called for in the recipe. I would have liked to have a little bit more caramel as well. It may have been enough for the baby cakes, but for the twelve inch pan it was a bit scarce. 

I was on my own for dinner the day I made this (which I love when I have baking and blogging to do!) and must admit that I had two slices of this delicious cake for my meal before I proceeded to wrap it up and take it to my sister for her to take into work with her the following morning.

She texted me the next day to say "the cake was creamy-moist and the rhubarb was just the right amount of tartness", and the consensus from her co-workers: recipe please!

Success meter (1-3):


Spreading the caramel and nuts pretty much removed most of the butter and flour from the bottom of the pan.

 So very pretty - don't you agree?


 Not quite enough batter to completely cover the topping.

I flipped the cake out immediately after removing from the oven. Still the topping stuck. Good thing I did not painstakingly arrange the rhubarb in circles as instructed.


Looks a little better after scrapping the pan of the stuck topping and smoothing it back onto the cake. The only problem is the caramel did not disperse evenly.

 The crispy edge.


This turned out to be a delicious cake. If you would like the recipe, visit Erin of When in Doubt…Leave it at 350, our host for this recipe.

I'm looking forward to seeing what other substitutions were used from the talented bakers in the group - so make sure to check out their creations as well. You can find their links over at the TWD website listed under LYL: Rhubarb Upside-Down Cake.

Thursday, May 2, 2013

Beautiful Baby Beet Salad

From the book Celebrate! by Sheila Lukins


I recently posted a recipe for a beet salad, and as I mentioned in that post we love beets in our household, hence another beet salad recipe so soon, yet very different from the last.

Normally I like to use a mixture of red and golden beets; however, on a beautiful sunny day at the farmer's market the golden beets stood out and screamed summer to me, where the red ones made me think of winter, so golden beets only this time around. And to be fair, I used only red beets in the last salad. 


To prep your beets for roasting, trim the greens to about an inch long. The directions have you trim the root end as well, which I have never done in the past. I would not bother with trimming the root, it leaves the firm end of the root exposed and it pokes through the foil; and you don't want beet juice dripping all over the bottom of your oven.

After roasting, let the beets cool enough to handle and then simply slip the skins off.


In addition to the beets being tossed in a vinaigrette, this salad is served with an orange-mint dressing to serve on the side for dolloping on top.

Whenever a recipe calls for mayonnaise, I always use half mayo and half non-fat plain Greek yogurt. Fage brand is my favorite.


The dressing is made up of mayo, mint, orange zest and juice, salt and pepper. At first bite I liked the dressing with the beets, but the orange zest had a bitter aftertaste that I did not care for. My husband said he too preferred the beets without the dressing - it was too overpowering - you could not taste the beets themselves.

If not for the bitterness of the zest, this would have made a great appetizer.

Success meter (1-3): 2