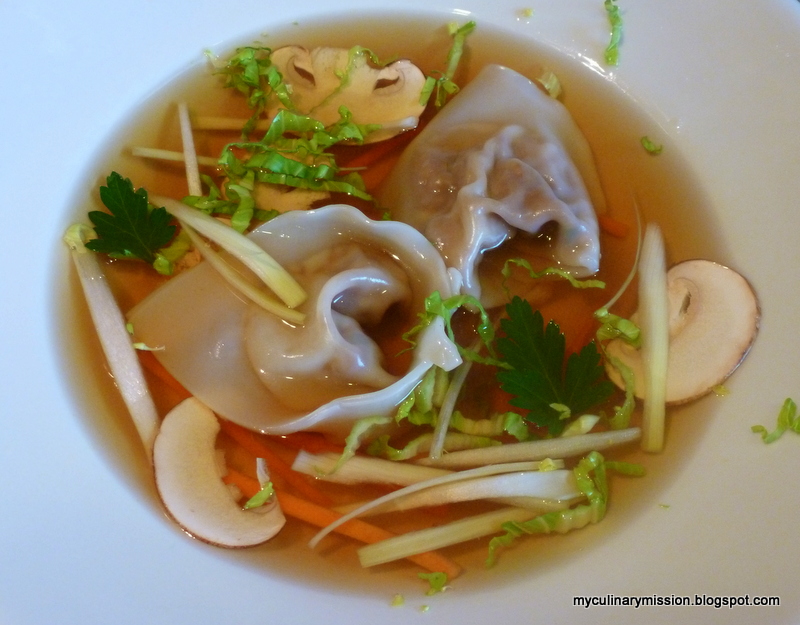
Friday, March 23, 2012

Book Seventy-Nine: Techniques of Healthy Cooking

by The Culinary Institute of America


                                                                                     Wonton Soup


I'm surprised I even got dinner on the table. I did not start this until two o'clock in the afternoon, which my daughter kindly told me I better get started. Taking pictures as you cook adds considerable amount of time before you get your finished product on the table. We finally sat down to eat at seven o'clock.

I definitely did not have it together for this evening. I forgot to defrost the egg whites (YAY! I used up all the egg whites from a previous recipe - my mother-in-law would be so proud that I did not toss them) and forgot to cook the chicken for the filling. Speaking of the filling, I was not a big fan of the wontons. I did forget to add the tofu; which I don't think would have any impact on flavor. Maybe too much ginger or maybe I was just too tired to enjoy them. This recipe made a ton of wontons. I'll freeze the extras and maybe I'll like them more when I haven't spent five hours in the kitchen preparing dinner.

I never heard the term oignon brûlé. I took a guess that it was close to a burnt onion! So I cut it in half and grilled it on a grill pan. Oh the aroma! Next time I would chop it up after grilling. I added it whole - well two halves.

The recipe states to cook the wontons in simmering water then add to the hot broth. I figure this is to keep the consommé clear should the wontons break or leak while cooking.

This certainly is a time consuming recipe but was enjoyable at the same time. I'm glad I made the consommé instead of using purchased stock. The broth turned out flavorful and beautiful. I rated this recipe a three for it was fun and fairly simple; I just did not care for the flavor of the wontons. I will have to ask my sister-in-law for her recipe that she makes every year at Christmas.

Success meter (1-3): 3


This book is geared more towards restauratuers than the home cook.
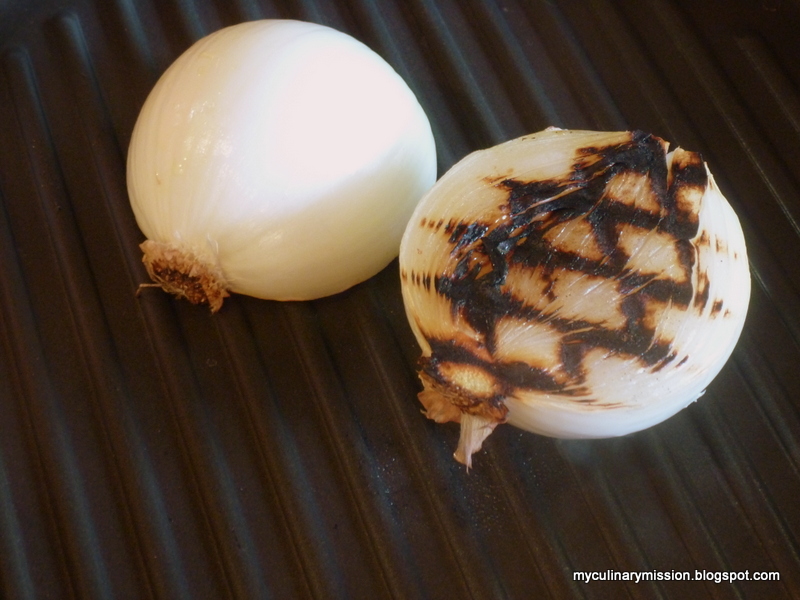
Oignon Brûlé (?)

Sachet d'Espices
(thyme, bay leaf, peppercorn, parsley stem)

Looks good already!


Had to change pots after adding broth - no room!

It amazes me that this cloudy concoction turns
into a beautiful clear amber broth. 

The solids form a "raft".
This is when you stop stirring and let simmer.

How beautiful is this?


This method to remove fat did not work for me.
It only seemed to soak up the broth.

Gorgeous!

The filling.


Finally got the hang of it after a few!


Garnishes.


Tuesday, March 20, 2012

TWD: Irish Soda Bread

Contributing Baker: Marion Cunningham


                                          Irish Soda Bread

This week I am co-host of Tuesdays with Dorie along with Carla of Chocolate Moosey. One of the privileges of hosting is Carla & I get to post the recipe on our blogs. With such an easy recipe I was worried I would not have much to say ~ surprise!

The book states that this bread does not last past the day it is made. I whipped this up after getting home from a 12 mile hike; this is so easy you can whip it up quickly (only 4 ingredients!) and toss it into the oven to bake while you prepare dinner, and have fresh warm bread to go along with. This is also the perfect recipe if you have young kids around and want to boost there confidence in the kitchen.

I took an un-traditional route and added approximately 1 cup grated Gruyère cheese to the batter and after forming the ball and cutting an X into the top I sprinkled more cheese on top. The finished product resembled in flavor a biscuit and with the added cheese it was so good it was hard to stop eating, even though this bread is heavy and dense and fills you up quickly.

Being that there is only two of us, we were unable to eat the whole loaf though we had no problem devouring half of it. I tossed the other half into the freezer which I took out the very next day since the weather turned cold and I made chicken noodle soup for dinner. Dipping the bread into the broth made it taste like a dumpling ~ and I love dumplings.

I had half of a loaf plus two slices in the bag from the freezer. The slices I wrapped in a paper towel and put into the microwave for about 10-15 seconds and wrapped the rest in foil and heated it in a 375°F oven till warm. The bread tasted fine, as it did the following day sitting on the counter in a Ziploc bag - just a bit drier texture. I toasted up a slice to go with my morning coffee and it was delicious, better in fact! Toasted, this would be really good with scrambled eggs and a great canvas for leftover lekvar for those of you that made it from our previous recipe of rugelach.

There is something to be said about making your own bread; even the more time consuming yeast breads. The aroma while baking, and the warm, tasty goodness of fresh bread from the oven puts you in a state of overwhelming bliss.


Success meter (1-3): 3


The broth soaking into the bread gives it a dumpling like flavor.

Makes wonderful toast even three days later!
Crunchy outside ~ soft and chewy on the inside.

Do make sure to check out Carla's site for her experience with this bread and take a peek at the other bakers of our group; it just may inspire you to purchase a copy of Baking with Julia and bake along with us.


Monday, March 12, 2012

Book Seventy-Eight: Barefoot Contessa Parties!

by Ina Garten


                    Chinese Chicken Salad

This is the last of the seven books I have of Ina's and the last you will have to hear me say I do love her books for her simple, quick, and tasty recipes. I have yet to be disappointed with a recipe from Ina, nor do I expect to be.

With some leftover chicken from the chicken noodle soup (another Ina recipe!) that I made last night for dinner, I was able to whip this up in even less time than it would have taken to make this salad. To make it a bit more substantial I served it over a bed of greens tossed with some of the dressing.

Success meter (1-3): 3


Tuesday, March 6, 2012

TWD: Rugelach

It's Tuesdays with Dorie and my 100th post!! Woo-hoo!! Now if I only had a party to go to so I could bring dessert.


                                Rugelach


I was one tablespoon short of butter but I don't think it will make that much of a difference being there are three, yes three sticks of butter and the same amount of cream cheese. I was not liking the taste of my cream cheese though I used it anyway. I bought regular (not whipped) in the tub rather than the brick for it came in the amount of 12oz that was called for in the recipe. It did not taste bad, just different. Maybe the plastic tub imparts an odd flavor; next time I'll by the brick of cream cheese.

The dough was easy to throw together - 10 to 15 minutes tops, including taking photos. I made the dough on Thursday and put it in the freezer to finish on Monday.

Here it is Monday and I thought I would finish these up real quick; alas I did not realize I have to chill the filled dough for another 4 hours or overnight. Into the freezer they go for 2 hours!

To differentiate my two fillings I did one half of the dough crescent style (chocolate/cherry) and the other half rolled and sliced (fig/apricot) as per Dorie's instructions. Not only are the rolled and sliced easier, less time consuming, but a lot less waste of the filling. I noticed that smaller crescents roll a lot easier than the larger ones; go figure. The excess filling I will be throwing into the freezer for cookies later.

Speaking of waste, I felt the filling and coating measurements were excessive - I had a lot leftover. Maybe I did not put enough on my pastry as I was supposed to.

I wish I had made the fig/apricot in the crescent shape. They held their form a lot better than the rolled and are WAY better tasting then the chocolate/cherry flavor. Overall these are really good and as one other blogger asks her tester "are these a keeper?" Yes, they are.

For the recipe see this week's hosts' sites: Margaret and Jessica

Success meter (1-3): 3


Since I did not use any kind of jam with this,
I brushed the dough with melted butter so the
sugar mixture would adhere.

A large ice pack kept my dough the perfect
temperature while adding the filling.


The spilled out filling after rolling the
crescent shapes.


No spilled filling with the rolled version!


The directions should say to pinch the dough to seal.

The caramelized filling is to die for!

The second batch I baked seam side down rather
than cut side down. Fared a little better.

While still warm I scooped up the excess and
stuffed it back inside.

A lot of leftover filling and topping!